Creating Custom Bots in BoodleBox
Building custom bots in BoodleBox empowers you to create specialized AI assistants tailored to your specific needs. Whether you’re developing a teaching assistant, a research companion, or a specialized task helper, BoodleBox’s bot builder provides a flexible and intuitive platform to bring your vision to life. This guide will walk you through the complete process of creating, configuring, and optimizing your custom bot to ensure it serves its intended purpose effectively.
Continue reading to see more detailed information and get tips to help in your creation process ↓
Getting Started
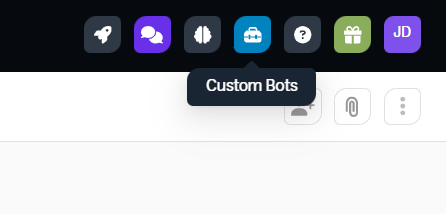
- Locate the ‘toolbox’ icon on the right-hand side of the top navigation bar.
- Click to open the bot builder window.
- Select ‘+Build Bot’ to begin.
- Give your bot a name and description (don’t worry, you can adjust this later).
Instructions: Bot Configuration Pt. 1
The bot creation form is a structured template designed to define your custom bot’s expertise, purpose, and operational approach. By completing these sections thoughtfully, you’ll create a bot that can effectively engage with users and achieve specific learning or task-oriented goals.
1. Bot Expertise & Role
This section establishes your bot’s identity by defining its area of expertise, primary function, and target audience.
- “You are an expert in [ ]” – This defines the bot’s area of specialized knowledge or skill (e.g., academic writing, chemistry, data analysis).
- “Your role is to [ ]” – This describes the bot’s primary function or purpose (e.g., guide students through writing essays, explain complex concepts, help analyze data).
- “Your audience is [ ]” – This specifies who will be using the bot (e.g., undergraduate students, graduate researchers, faculty members).
2. Learning Objectives
This section outlines what users should be able to do or understand after interacting with the bot (i.e., measureable outcomes).
- “Understand the basic principles of [topic]”
- “Apply [specific technique] to solve problems”
- “Create effective [deliverable]”
3. Bot Workflow
This section defines the step-by-step process the bot will follow when interacting with users.
- “Step 1: First, [ ]” – The initial action or question the bot will take (e.g., ask about the user’s goal, assess their current knowledge).
- “Step 2: After they respond, then [ ]” – How the bot will process and respond to the user’s input (e.g., provide specific guidance, ask follow-up questions).
- “Step 3: Next, [ ]” – The subsequent steps in the interaction (e.g., offer examples, verify understanding, provide practice exercises).
Pro tip: If you need help constructing a workflow, create a new chat in BoodleBox.
Example prompt: I am building a custom tutor bot for a university level Introduction to Business Management course. Could you help create a bot workflow that addresses these learning objectives [insert learning objectives]. It should follow this outline [insert outline].
Settings: Bot Configuration Pt. 2
Here you can manage the details of your custom bot, including:
- Uploading an avatar for your bot.
- Creating and adjusting your bot’s name.
- Selecting an alias for your bot.
- Outlining the bot’s description.
- Creating the custom greeting your bot will use to start chats.
Knowledge: Bot Configuration Pt. 3
Adding knowledge to your bot transforms it from a generic AI assistant into a specialized tool with context-specific expertise. Your bot can reference uploaded materials to provide more accurate, relevant, and personalized responses.
- Select ‘Add Knowledge’ to open the file upload dialog box.
- Click to choose files from your computer or drag and drop relevant documents.
- Supported formats: .pdf, .docx, .txt, .png, and .jpg
- Pro tip: Make sure you files have detailed names
- Once all files are compiled, click upload to add to your bot’s knowledge base.
- You can manage, delete, and update files at any time.
AI Model Selection: Bot Configuration Pt. 4
When building a custom bot in BoodleBox, choosing the right AI model is crucial for optimal performance. The AI model serves as the foundation for your bot’s capabilities, determining how it processes information and generates responses. Here’s how:
- In the bot builder test window, locate ‘Powered by ____’
- Click the default LLM name (Claude 3.5 Sonnet) to open a dropdown menu and view available models
- Select the model that best suits your bot’s purpose and requirements
- Pro tip: If you need help choosing the best model, you can reference our guide here.
- Pro tip: If you need help choosing the best model, you can reference our guide here.
Testing Your Custom Bot
When building a custom bot in BoodleBox, choosing the right AI model is crucial for optimal performance. The AI model serves as the foundation for your bot’s capabilities, determining how it processes information and generates responses. Here’s how:
- Click the ‘Test Bot’ button in the example chat window.
- The chat bar will unlock, allowing you to run a test conversation with your custom bot.
- Things to look out for:
- Start with a simple greeting to verify bot’s introduction.
- Confirm the bot responds according to its defined role and expertise.
- Try various types of questions related to bot’s purpose.
- Test knowledge integration by referencing uploaded materials.
- Ensure responses are clear and appropriate for target audience.
- If responses aren’t as expected, review and adjust the configurations.
Publish & Share
Once everything is operating as expected, click ‘Publish’ to make your custom bot public. A confirmation window will open, allowing you to share the link to your custom bot. You can access this link at any time in two ways:
- Through your Custom Bot window (toolbox icon)
- In your Bot Garage under ‘custom bots’
Creating a custom bot in BoodleBox is an iterative process that combines clear instruction design, thoughtful configuration, and strategic knowledge integration. Remember that the most effective bots are those that evolve based on user feedback and changing needs. Regular monitoring and refinement of your bot’s performance will help ensure it continues to provide value to its users. Whether you’re building your first bot or expanding your existing collection, BoodleBox’s comprehensive tools and features support you in creating AI assistants that truly enhance productivity and engagement.

